Download your FREE ebook!

Generic selectors
Exact matches only
Search in title
Search in content
Post Type Selectors
post
recipe
product

Cart

Healthy Vegan Ice Cream Cake

Jump To Recipe
At the end of summer, I have an ice cream cake for you! In Kuwait, summer still has a few months to go…so my timing isn’t too bad. As with most of the recipes I share here, this dessert is vegan, gluten-free and naturally sweetened.
The recipe was inspired by Meera Sodha’s, but I wanted it to be a bit more wholesome. As I explain in my free Guilt-Free Desserts Ebook, it’s easier to use wholesome ingredients with stronger flavors. So I chose to go with chocolate and banana. Banana is also excellent added to healthy baked goods, bringing sweetness and binding power, thus reducing the sugar required, and helps with egg-free baking.
The recipe does have several steps, but it’s quite easy to make. You just need to plan ahead. And you can always make it in advance of your gathering or party, and just take it out 10 minutes to thaw a little before serving. I prefer to cut slices and serve on a plate with some dairy-free ganache and return the rest of the cake to the freezer. Most likely not all of it will get eaten, and you won’t risk it melting.
I’ve tested the cake in both a 20cm and 23cm pan. Either use a cheesecake pan or the ones with a loose bottom. I preferred the smaller pan as the cake has a bit more height. If you are using the smaller pan, you will have a little extra crunchy topping leftover, which is delicious on it’s own, or use to sprinkle on some fresh strawberries or your morning oats.
A little explanation about cereal milk…the trend was started by the genius behind Momofuku Milk Bar, Christina Tosie. Anyone who grew up eating cereal for breakfast is aware of the taste of the milk at the bottom of your bowl of cornflakes. Well, using that nostalgic childhood flavor, Christina created cereal milk ice cream! And the trend grew from there. In this recipe, we use cornflakes soaked in oat milk to get the cereal milk flavor. I urge you to taste the oat milk before and after the cornflakes have been soaked and drained, and you will feel the difference. I must admit though, once the banana and cashews are added the flavor is masked slightly. So this additional step, and additional ingredient can be skipped if you wish. Honestly I’m not too happy when throwing out the soaked cornflakes.
A few other notes about the ingredients and substitutions:
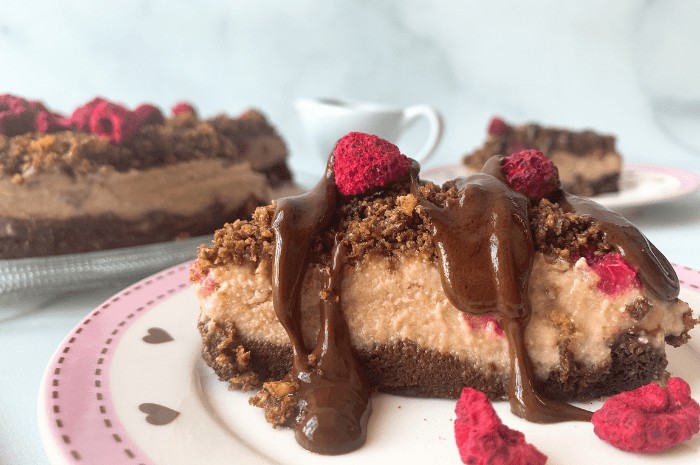
Almond flour – I would expect oat flour to work just as well.
Tapioca flour – use cornstarch or arrowroot.
Coconut sugar – whole cane (brown) sugar or date sugar. Keep in mind date sugar will be less sweet.
Dairy-Free milk – for the cake it doesn’t matter what milk you use. My usual go-tos are oat and almond. However for the ice cream it’s important to use a relatively thicker milk, however not canned coconut as that will mask the cereal flavor. I’ve tried making the ice cream with homemade almond milk where you can control the creaminess by adding less water, or a barista style milk that is usually thicker than regular dairy-free milks. Again my preference is for barista oat or almond. Oat milk has a slightly sweeter taste and pairs well with the cereal flavor we are after.
Cashews -it’s best to buy raw cashews and roast them at home yourself. Pre-heat the oven to 350F or 160C and spread out the cashews on a baking sheet. Roast for 12-15 minutes until golden. Shake the pan half way through.
Maple syrup – honey or agave can replace the maple. Both are slightly sweeter than maple. So add 3 tablespoons to start and add more if you like. You can also add a couple of dates, and blend well until smooth. If your dates are very dry, soak beforehand to soften.
Raspberries – Any berry can be used, but the contrast of the red color in the cake was an incentive. You can use fresh or frozen, or just totally leave them out. If you are a fan of banana, then slices of banana can be used.
Cornflakes – try your best to use organic cornflakes. Corn that is not organic is most likely genetically modified and we need to avoid GMO foods whenever possible.
If you have any questions please share them with me below. And check out this video for a visual of how to make the cake.


Healthy Vegan Ice Cream Cake

Print
Cook Time: 20min
|prep Time: 30min
| total Time: 60min
| servings: 8

ingredients:

Cake Layer:
1 tablespoon ground chia seeds
1/2 cup (50g) blanched almond flour
3 tablespoons (23g) tapioca flour
1/4 cup (40g) coconut sugar
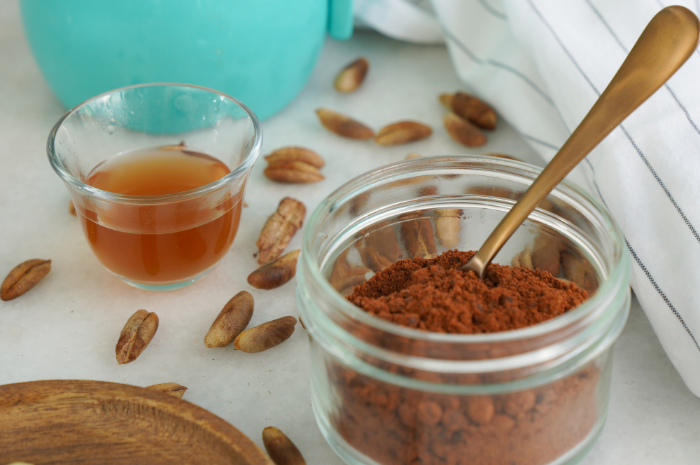
1/4 cup (25g) coaco powder
1/4 teaspoon baking powder
1/4 teaspoon baking soda
1/4 teaspoon salt
1 medium ripe banana (1/4 cup or 90g)
1/4 cup (60ml) dairy-free milk (at room temperature)
2 tablespoons (30ml) coconut oil, melted
1 teaspoon vanilla extract

Ice Cream Layer:
3/4 cup (100g) roasted unsalted cashews (see intro)
3/4 cup (75g) cornflakes, scrunched up after measuring
1 1/4 cups (300ml) barista oat or homemade almond milk (see intro)
2 ripe (180g) frozen bananas
1/4 cup (60ml) maple syrup
1 teaspoon vanilla extract
1/8 teaspoon sea salt
1/2 cup (50g) fresh or frozen raspberries

Cornflakes Topping:
1 cup (50g) cornflakes, crushed into fine crumbs
3T (30g) coconut sugar
2 teaspoons cacao powder
2 tablespoons (30ml) coconut oil, melted


Instructions:

To make the cake:
1. Pre-heat the oven to 350F or 160C. Line a 20cm (8inch) springform or loose-bottom pan with parchment paper. Set aside.
2. In a small bowl whisk together the ground chia seeds with 2 tablespoons of water, and set aside until it thickens.
3. In a medium bowl, whisk together the flours, sugar, cacao, baking powder, baking soda and salt.
4. In another medium bowl, mash the banana, then add the milk, chia gel, oil and vanilla. Mix well until smooth.
5. Add the liquid mixture to the dry ingredients and fold until no flour remains.
6. Pour into the prepared pan, spreading out the batter as it might be a little thick. Bake for around 15 minutes until a toothpick inserted into the center comes out with a few crumbs attached.
7. Let cool completely. Then turn out the cake, peel back the parchment paper, and return to the pan.

To make the ice cream:
1. Place the roasted cashews in a medium saucepan, cover with water and bring to a boil. Lower the temperature and simmer for 20 minutes. Remove from the heat, drain and set aside to cool.
2. Meanwhile, add the cornflakes to the milk, and let soak for 20 minutes. Drain the cornflakes from the milk, squeezing out as much milk as possible. Discard the cornflakes.
3. Once the cashews have cooled, and the cereal milk is ready, place all the ice cream ingredients, except for the raspberries, into a blender or food processor. Blend until smooth.
4. The cake should have cooled by now. Before pouring the ice cream on top, gently press the cake to seal the edges as we don’t want any ice cream to pour out the sides. Carefully pour the liquid ice cream on top of the cake and place in the freezer for 1 hour.
5. After 1 hour, add the raspberries spreading them out evenly and pressing them down slightly. Return the cake to the freezer for another hour, and meanwhile make the topping.

To make the topping:
1. Place the cornflake crumbs, sugar, and cacao powder in a small bowl and mix to combine. Add the coconut oil and mix through to get moist crumbs. Once the ice cream is firm but still a little soft, about 2 hours from the first time it was placed in the freezer, sprinkle the crumb mixture all over the top. Press down gently to make sure it sticks to the ice cream.
2. Return the cake to the freezer for a couple of hours or overnight.
3. To serve take it out of the freezer and let it rest for about 10 minutes. Slice and enjoy. Or take it over the top with some dark melted chocolate or dairy-free chocolate ganache. A sprinkle of freeze-dried raspberries won’t hurt if you have them around.


Notes:

See intro for ingredients substitutions.
The cake will keep in the freezer for 2 months if not more.

Related Recipes

Leave A Comment

Your email address will not be published.

Processing...
Thank you! Your subscription has been confirmed. You'll hear from us soon.
ErrorHere