Download your FREE ebook!

Generic selectors
Exact matches only
Search in title
Search in content
Post Type Selectors
post
recipe
product

Cart

How to Make Coconut Yogurt at Home

Jump To Recipe
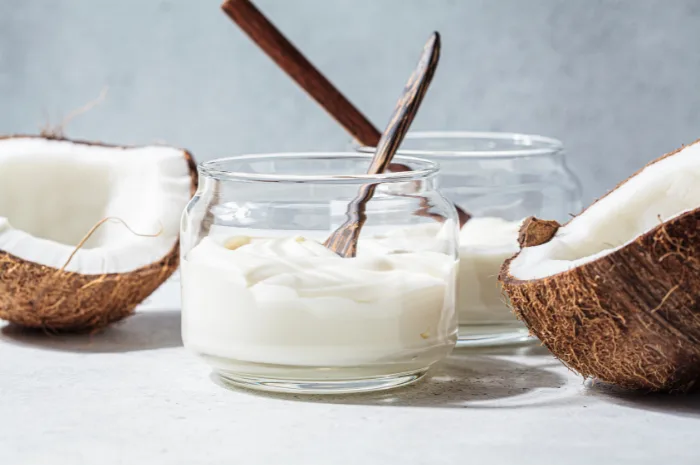
Before we get into the recipe (can we call it a recipe when there are only 2 ingredients?), I must admit that I almost never eat yogurt…not on it’s own at least. I’m a baker and I love yogurt for use in baking. The acidity in the yogurt reacts with the baking soda to encourage leavening and adds a nice tangy taste that helps give both sweet and savory goods a more interesting flavor.
That tangy flavor is a plus in baking but puts me off when having the yogurt alone. And with coconut yogurt, especially home-made, that sour taste can be even stronger. The strength of sourness can be controlled somewhat by increasing or reducing the fermentation time. Let’s leave the taste aside, by consuming coconut yogurt you benefit from the healthy fats and the health benefits of the probiotics that do wonders for your gut and immunity.
As I mentioned earlier all you need are two ingredients. First, full-fat, preferably organic, coconut milk. And second, a good quality probiotic, and not one that has been sitting on your shelf for a few months…as most likely the bacteria won’t be alive anymore. Just make sure that the probiotic you choose has lactobacillus bacteria.
You can use the whole can of milk or refrigerate it overnight and then use the cream only. The water is delicious in smoothies so don’t throw it out. I prefer to use the whole and strain the yogurt using a nut milk bag once it’s ready. The water that seeps out I use as recipes calling for buttermilk by adding a little of the yogurt to it. If you choose not to strain it, it will have the consistency of laban.

Another option is to heat the milk prior to making the yogurt and adding a thickener such as agar-agar or arrowroot. I prefer not to follow this step. It’s not worth it and I can get a decent result without it.
 
Now for something VERY VERY IMPORTANT! You must use a sterilized mason jar or bowl. Make sure it’s clean and add boiling water to ensure no mold or bad bacteria gets in there while fermenting the yogurt. Don’t skip this step. I have and the result was awful! If there’s a pink or grayish residue on the top of your yogurt after fermentation that’s bad bacteria and you will have to throw it out.
 
Now the best temperature for fermentation is 110F or 45C. To achieve that you have three options:

Electric oven: Turn the oven light on but no heat. If it’s winter or very cold where you live, you can turn the oven on just for a short while and then turn it off.

How to Gas Oven: Turn the pilot light on. As for the electric oven, if you are in a cold climate you can warm up the oven for a short while and then turn it off.

Dehydrator: You can choose the correct temperature and leave it running until the milk turns into yogurt.
 
How long for? 12-24 hours. You will know it’s ready when it tastes like yogurt. The taste will become stronger if you leave it to culture for longer.
If it’s your first time just half the recipe below with 1 can of coconut milk. Once you’ve got the hang of it and achieved a successful result, use 2 cans as outlined below.
 
Good luck and let me know now once you’ve tried making it!

How to Make Coconut Yogurt at Home

Cook Time: 12-24 hoursmin
|prep Time: 5min
| total Time: 12-24 hoursmin
| servings: 4

Ingredients:

2 cans full-fat coconut milk, preferably organic
2 probiotic capsules
1/2 teaspoon honey (optional)


Instructions:

1. Sterilize a large glass jar or glass bowl by washing and covering with boiling water. Dry well.
2. Add the coconut milk to your chosen vessel, and add the probiotic and mix well. Add the honey. If using.
3. Place in your oven with the gas/pilot light on or a dehydrator at 110F (45C) for 12-24 hours, until the coconut will have curdled and taste like yogurt.


Notes:

If there’s any pink or gray color appearing on the yogurt while it ferments, that means it has been contaminated with bad bacteria and you need to throw it away. Make sure to always sterilize the jar or container you will use. And start using only 1 can of coconut milk before moving on to make a bigger batch.
Related Recipes

Leave A Comment

Your email address will not be published. Required fields are marked *